Run an AI-moderated study
Import data into existing interviews
Admin and Member can use Import to connect additional metadata and open-ended answers from a spreadsheet to interviews that already exist in a Chat project. The import does not create new interviews.
The following steps apply exclusively to Chat projects.
The following steps apply exclusively to Self Service.
Import is not available as a self-service action in Managed Service. Coordinate any required data import with the xelper team.
What the import does
Each row in the file is matched to an existing interview through a shared identifier. For matched interviews, xelper can:
- add or update metadata,
- create metadata fields and segment filters,
- turn codes or numbers into readable groups,
- add open-ended answers as notes under an existing or new topic.
Interviews without a matching identifier remain unchanged. Identifiers in the file that do not match an interview are not imported.
Prepare the file
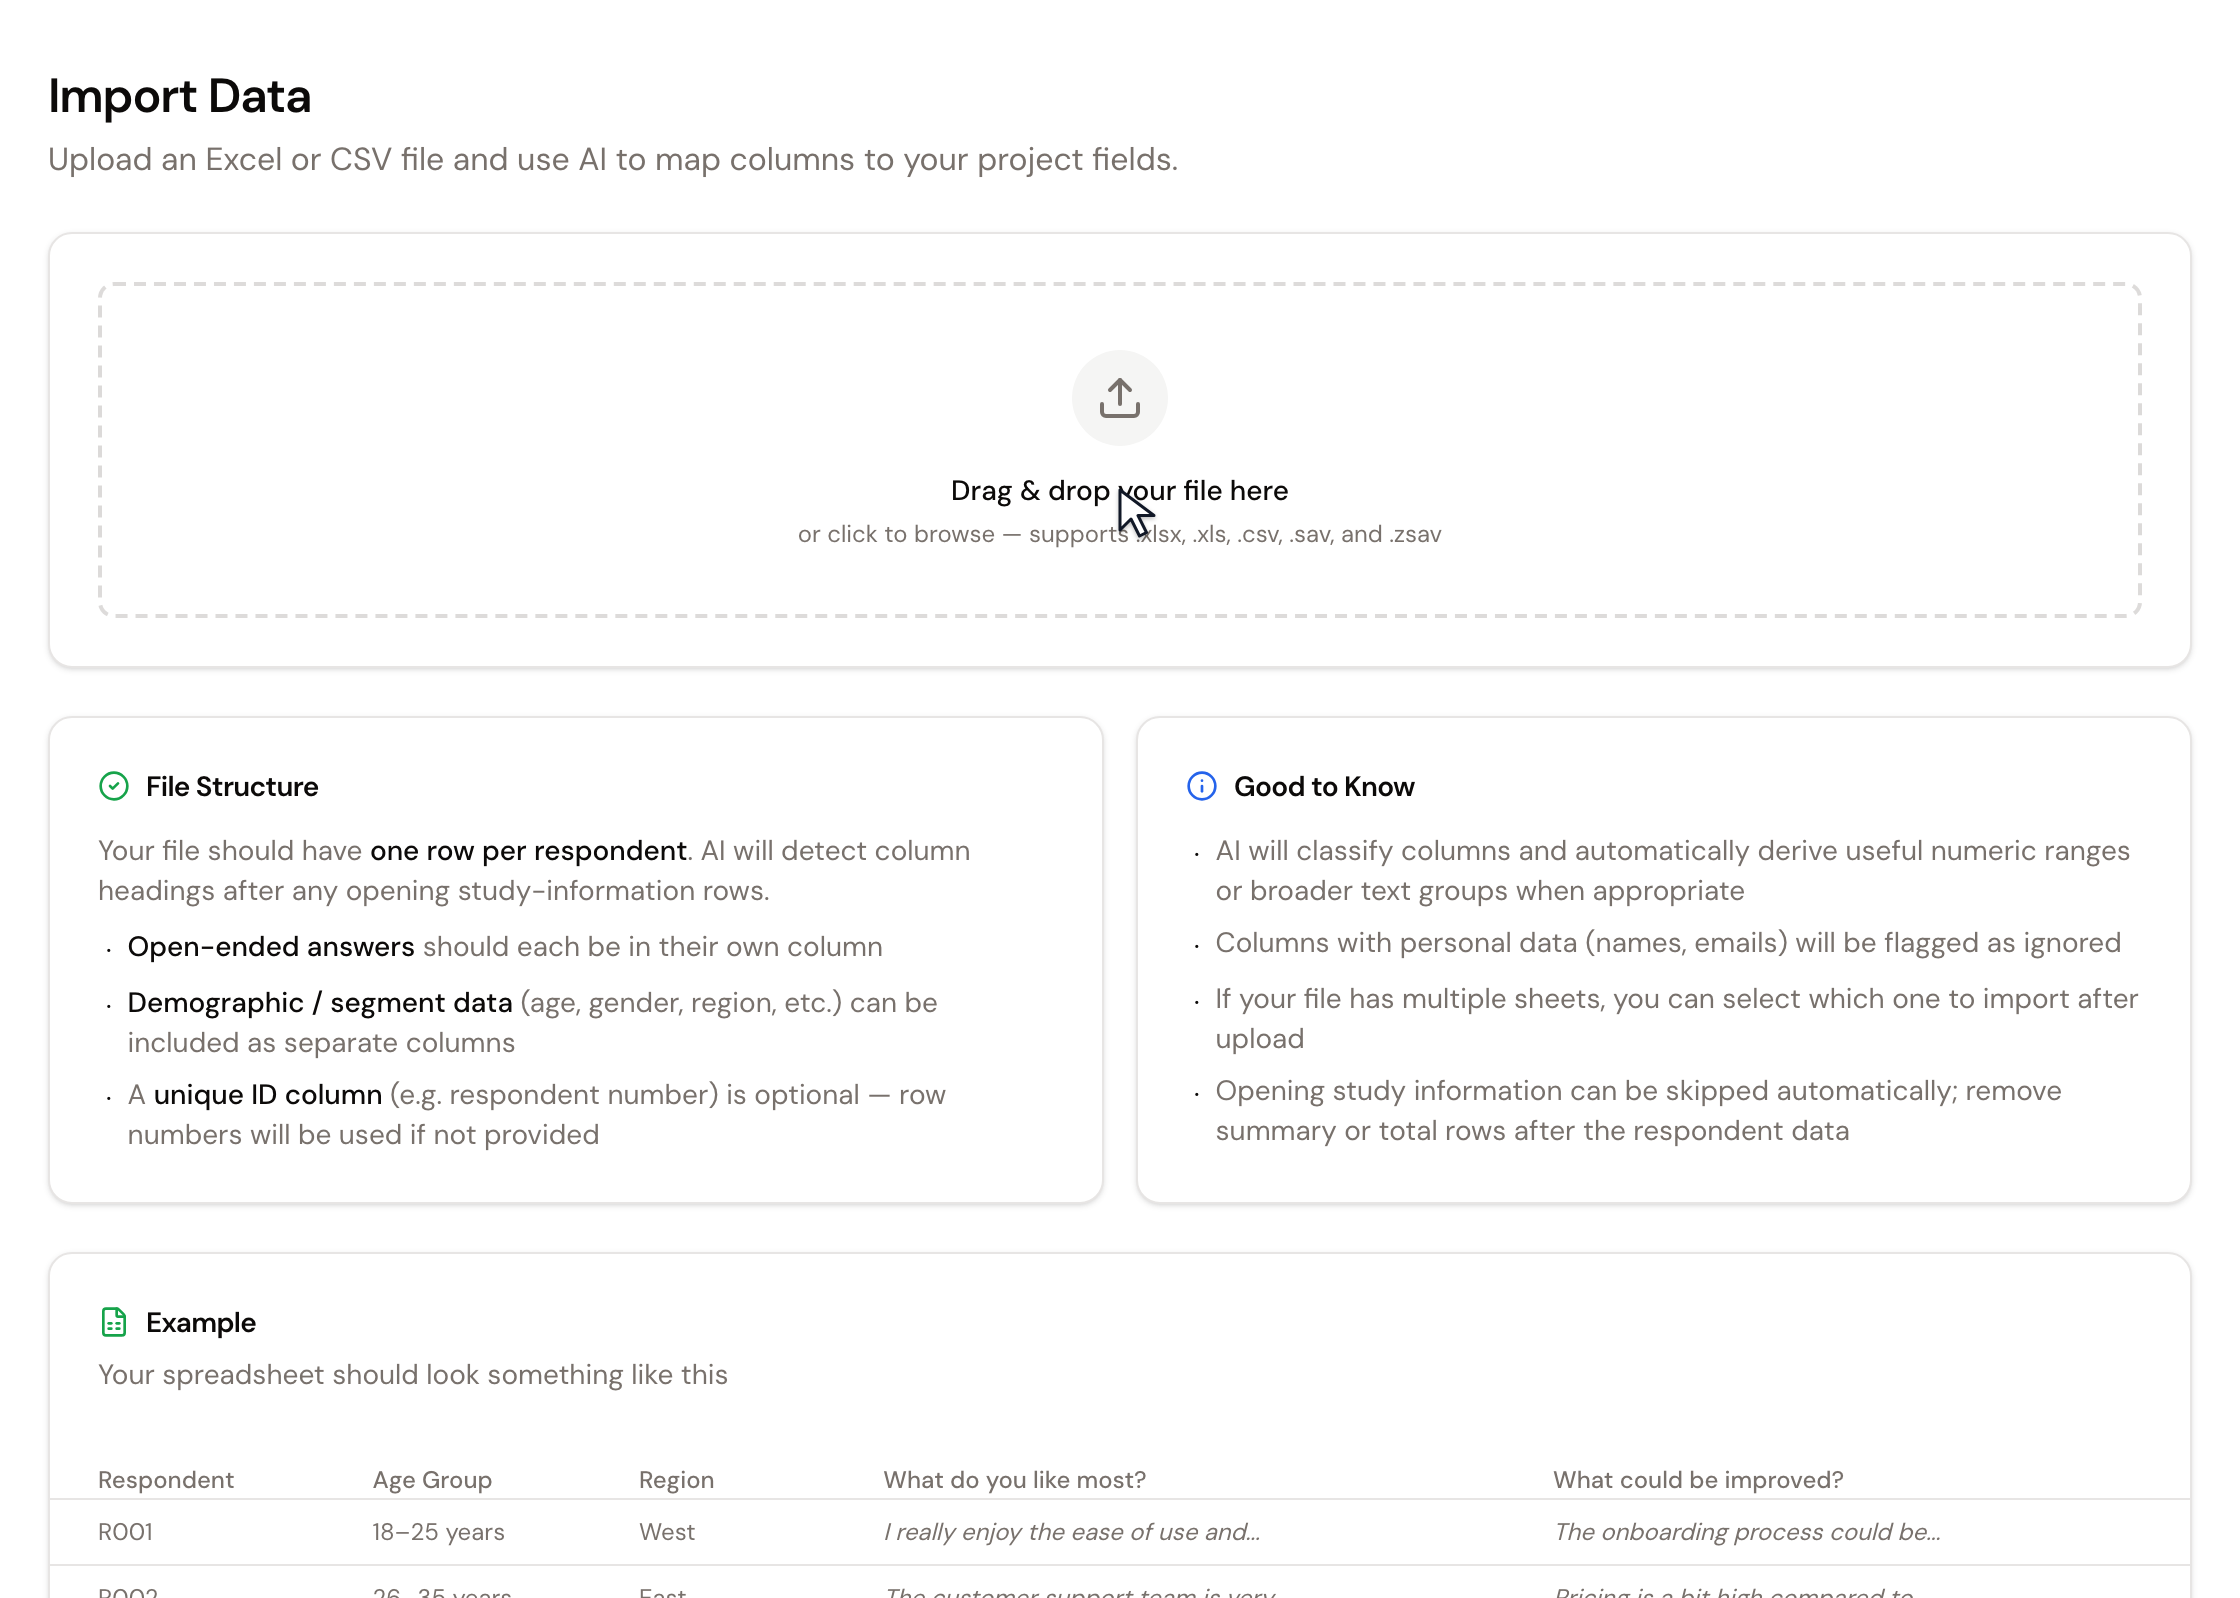
Use an Excel, CSV, or SPSS file in .xlsx, .xls, .csv, .sav, or .zsav format. The file may be up to 100 MB and should contain one row per interview.
Place different kinds of information in separate columns:
- a unique identifier stored both in the file and in the existing interviews,
- metadata such as age group, region, or usage type,
- each open-ended answer in its own column.
Remove summaries and total rows below the respondent data. xelper can detect introductory study information above the column headings while reading the file.
1. Select a file
Drag the file into the upload area or click the area to select it.
If the file contains several sheets, select the sheet that holds the data you want to import. xelper shows the row and column count for each sheet.
2. Set the column-heading row
xelper reviews the opening rows and detects whether the column headings begin in row 1 or after introductory study information.
When xelper detects a later heading row, a dialog shows the proposed column names. Choose:
- Ignore leading rows to skip the proposed introductory rows,
- Keep row 1 when the first row already contains the correct headings.
3. Review the column mapping
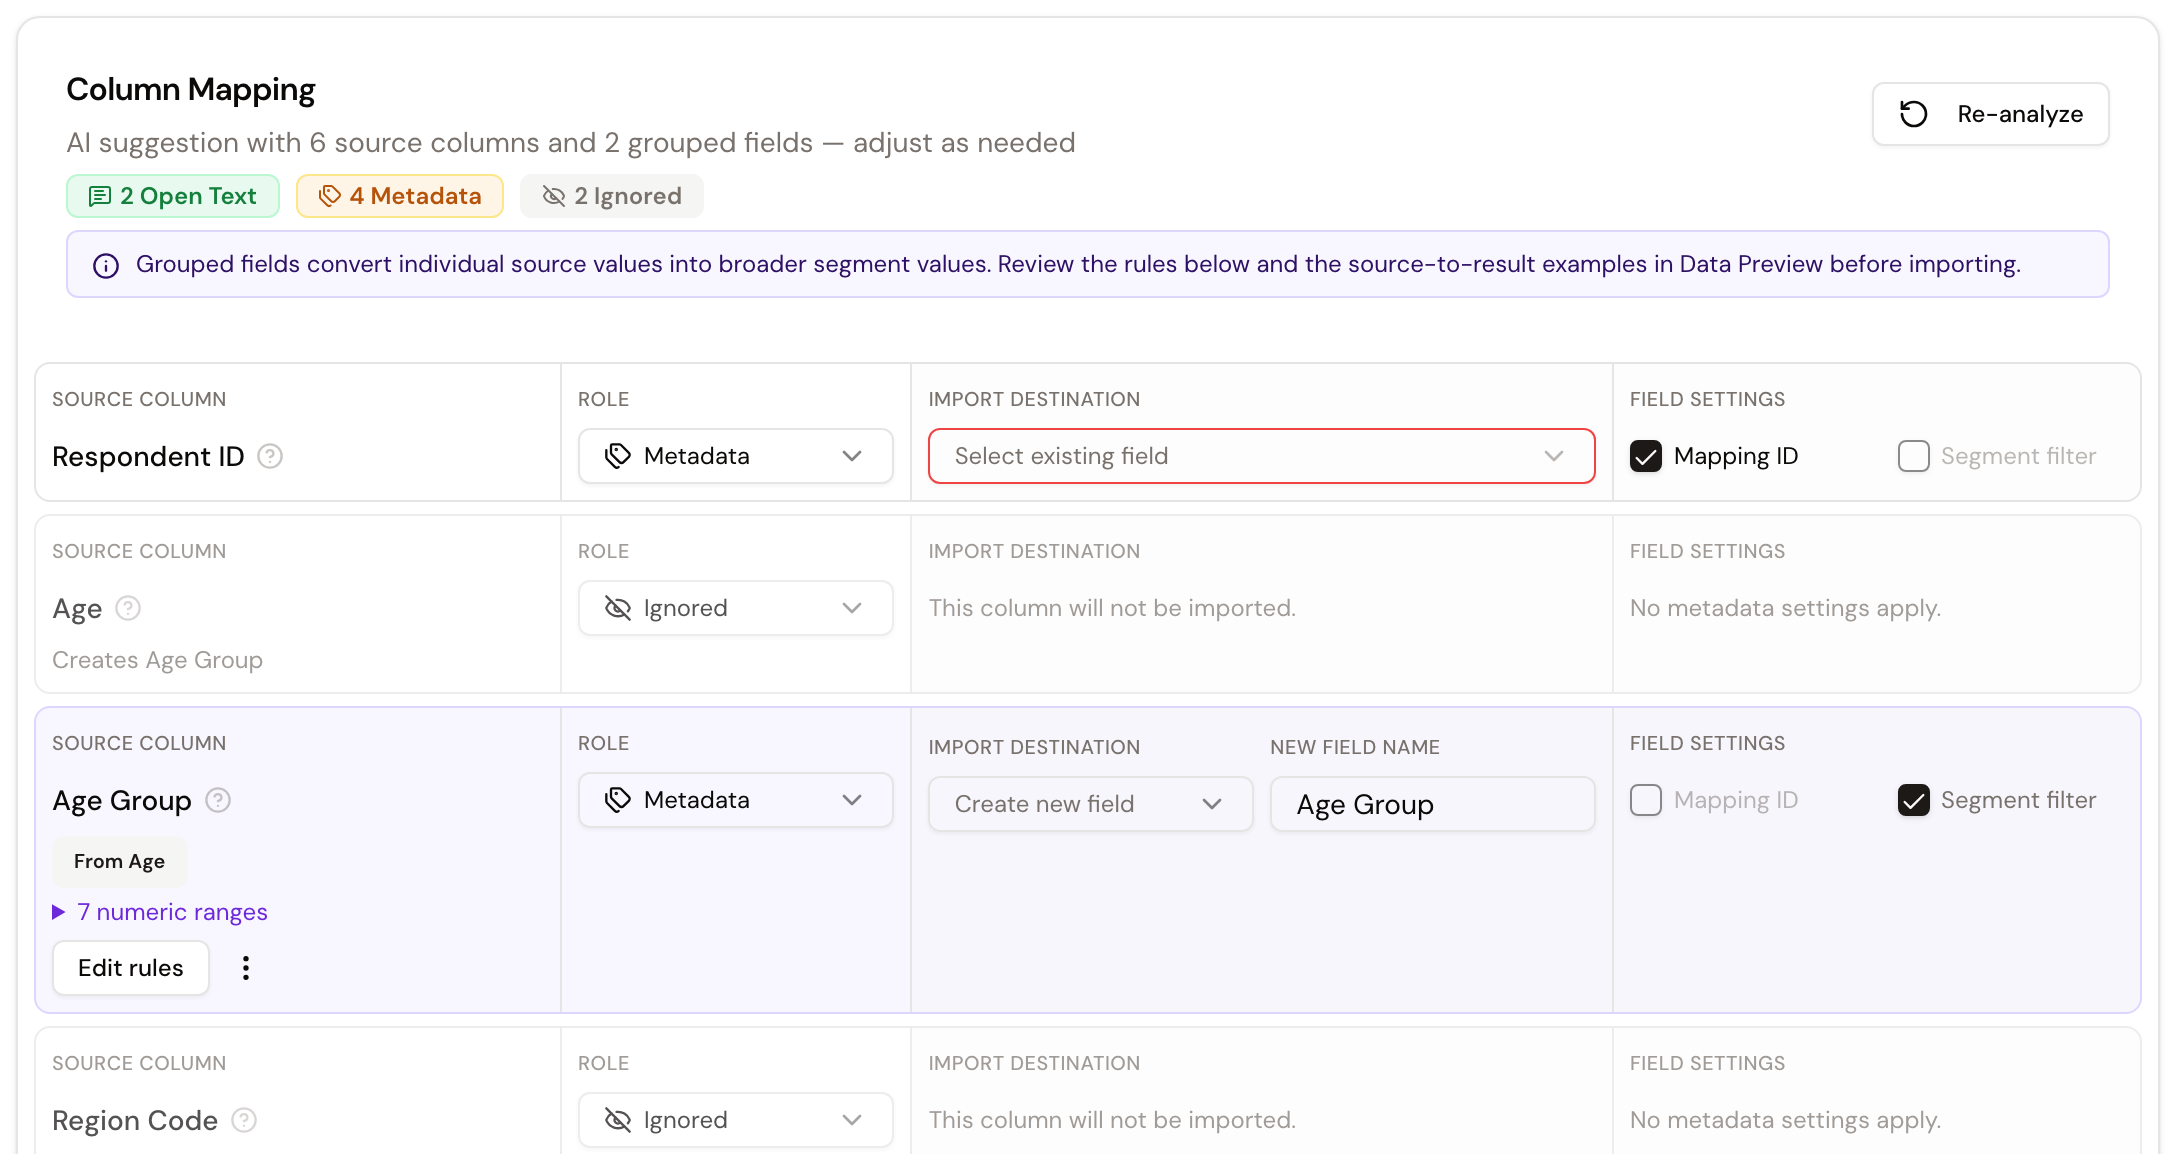
After reading the file, AI suggests a role for every column. You can adjust every suggestion before importing:
- Open Text: Values are prepared as open-ended answers for qualitative analysis and added to a topic as notes.
- Metadata: Values are imported as information about the matched interviews and can be used for filtering or segments.
- Ignored: The column is excluded. Names, email addresses, ratings, and timestamps are commonly assigned this role.
The question-mark icon beside a column name explains the suggestion. Choose Re-analyze to generate the suggestions again.
4. Match interviews with the Mapping ID
Mark exactly one metadata column as the Mapping ID. Its values must match a field that already exists on the interviews, such as a respondent number passed through the interview link.
Under Import destination, select the existing project field containing the same identifier. A Mapping ID is used only for matching and cannot be a segment.
For other metadata columns, choose:
- whether to create a new field or update an existing field,
- the name of a new field,
- whether it should become a Segment filter,
- whether Overwrite values may replace existing values.
Use Map values to convert numeric values or codes into labeled groups. For example, exact ages can become age groups, or numeric codes can become readable region names. The rules remain editable, and their effect appears in the data preview.

5. Assign open-ended answers to a topic
For every Open Text column, either select an existing topic or create a new one:
- For an existing topic, add the original question from the import file.
- For a new topic, enter the topic name and question and decide whether the answers should also be classified as positive, neutral, or negative.
Every new import topic appears under Open-Ended Responses in the analysis area. Every non-empty cell is added to the selected topic as a new note.
Import open-ended answers only once
Importing the same open-ended answer again can create duplicate notes. Do not reuse the same file for open-ended answers that have already been imported.

6. Review the data preview
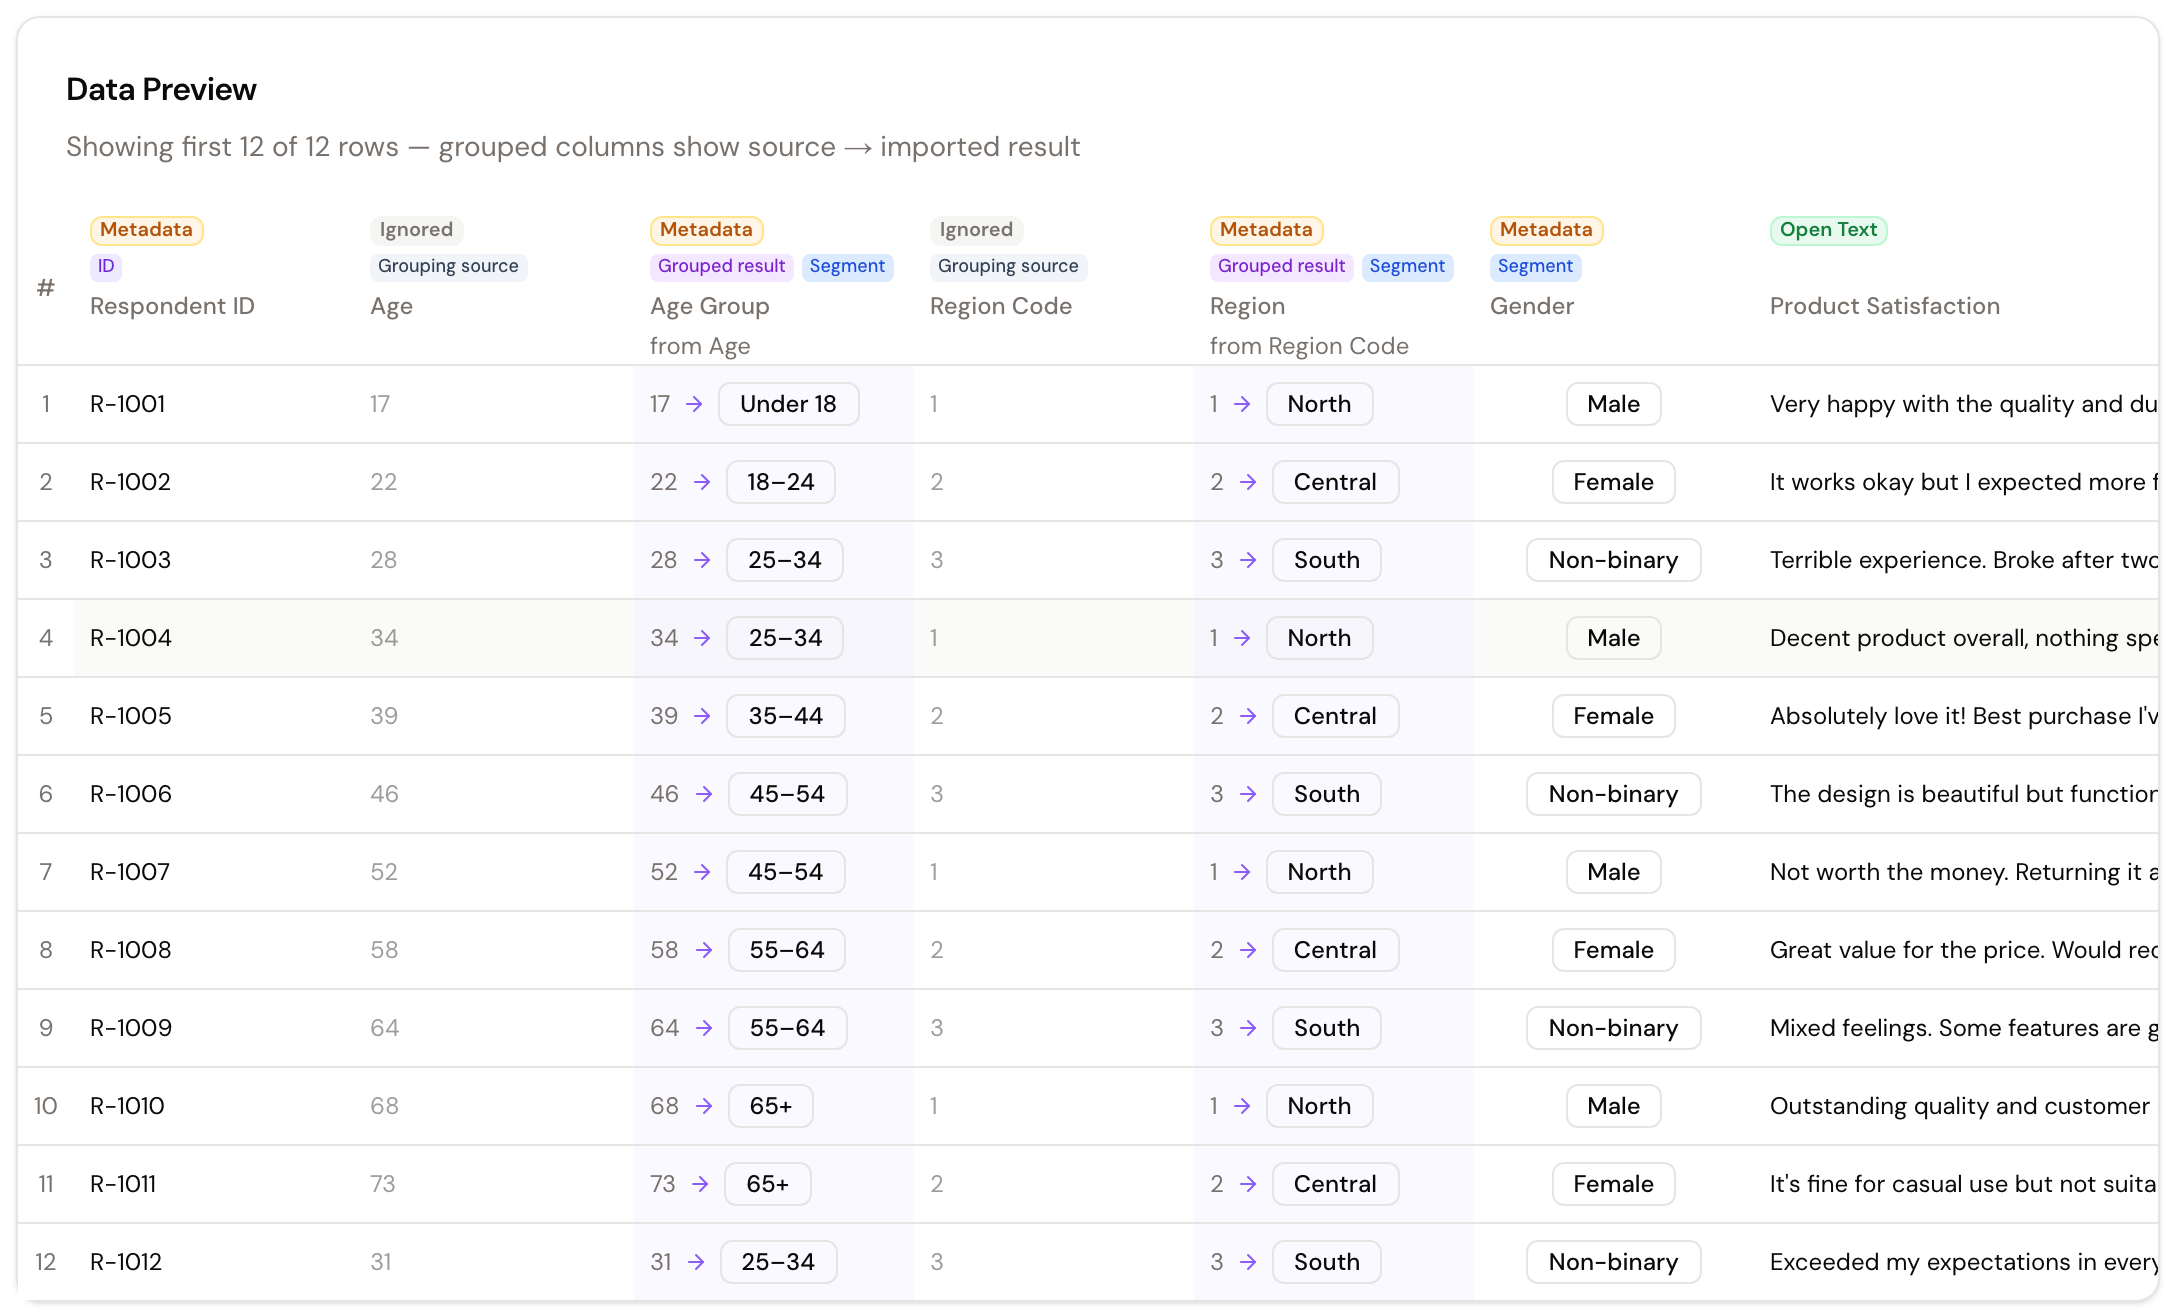
Data Preview shows the first 50 rows with their planned mapping. Labels identify columns treated as open-ended answers, metadata, the Mapping ID, segments, or ignored data.
For grouped values, the preview shows the original value and the resulting imported value. Adjust the mapping or grouping rules when the preview does not match the intended result.
Ready to import summarizes the number of open-text columns, metadata columns, and non-empty answers. Start Import becomes available once a Mapping ID, at least one column to update, and all required topic details are present.
7. Confirm the matched interviews
Before importing, xelper compares the Mapping IDs with the existing interviews.
- Existing matches found shows how many interviews will be updated.
- No existing matches found means none of the identifiers in the file match the selected project field. Go back and review the Mapping ID and import destination.
The import begins only after you choose Update … interviews. Only the matched interviews are updated; the import does not create new interviews.
During and after the import
The progress area shows the current processing step. It also lists identifiers from the file that did not match an existing interview and valid interviews that were absent from the file.
When the import finishes, xelper summarizes the metadata fields, topics, interviews, notes, and segments that were created or updated.
Who can import data
In Self Service Chat projects, Admin and Member can import data. Client cannot use the import page.
Next step
Open Manage fieldwork to view the updated interviews under Transcripts. Understand notes explains how imported open-ended answers appear in the analysis.