IDIs & focus groups
Create custom and filtered reports
Create a filtered report when you want to examine an existing topic within a narrower scope. Create a Custom Report when you want to answer a new question that does not yet have its own topic report.
The following steps apply exclusively to IDIs & focus groups.
Choose the right starting point
Start from an existing topic
Open a topic report and create a filtered version when the new report should continue using that topic’s notes and you want to:
- focus on one or more segments;
- use only selected transcript sections;
- add a more specific analysis focus;
- combine these settings in a new report version.
The filtered report remains on the same topic page as the original report.
This option is available for qualitative reports. For a Quantify report, use its interactive segment filter or create a new Custom Report with Quantify and the required scope.
Start with a new question
Open Generate Custom Report when the question needs its own report name or when no existing topic provides the right starting point. The completed report appears under Custom Reports in the Topics overview.
Use segment filters
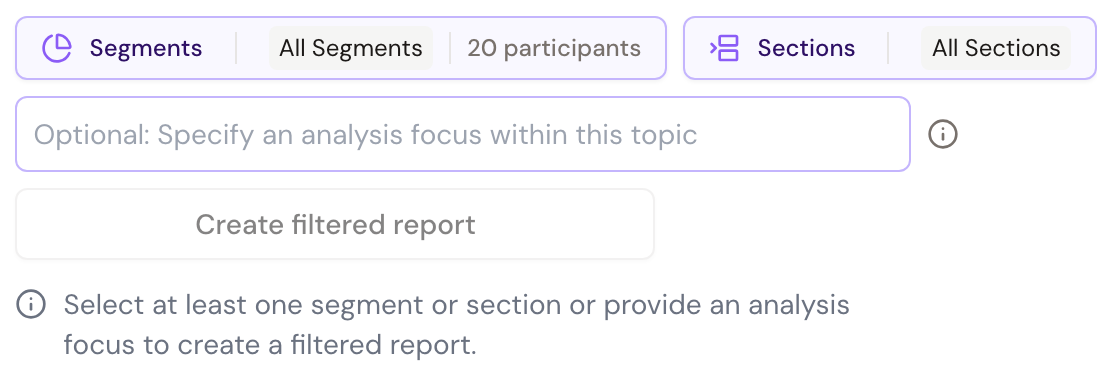
The Segments filter limits the report to selected participant groups. The control shows the number of participants in each segment and the total number included by the current selection.
When selecting more than one segment, choose:
- OR to include participants who belong to any selected segment;
- AND to include only participants who belong to all selected segments.
For example, Region North OR Region South includes both groups. Region North AND New Customer includes only participants who match both attributes.
Use section filters
The Sections filter limits the report to notes from selected parts of the discussion guide. This is useful when the same subject appears at different points in an interview.
For example, select the section before a stimulus to analyze initial reactions, or the section after the stimulus to analyze how responses changed. Selecting several sections includes notes from any of those sections.
Segment and section filters can be combined. In that case, the report uses notes that match the selected participant scope and the selected section scope.
On an existing discussion-guide topic page, Sections is not available because that topic is already tied to its guide section. Section filtering is available when creating a new Custom Report and on generated topics such as Suggested Topics, xelper Comparison reports, and Custom Reports.
Create a filtered report from a topic
- Open the existing topic under Overview.
- In the report area, select one or more Segments. For a generated topic, you can also select Sections.
- Optionally enter an Analysis focus to describe how the selected material should be interpreted or presented.
- Select Create filtered report.
- In Confirm Report, review the analysis focus and filters, then start the report.
An analysis focus changes how the report interprets and presents the selected notes. It does not select a different set of notes by itself. Use the segment and section controls when you need to change the source scope.
Once generated, the filtered report appears beside the earlier report versions on the same page. Its filter labels identify the scope used when it was created.
Create a Custom Report
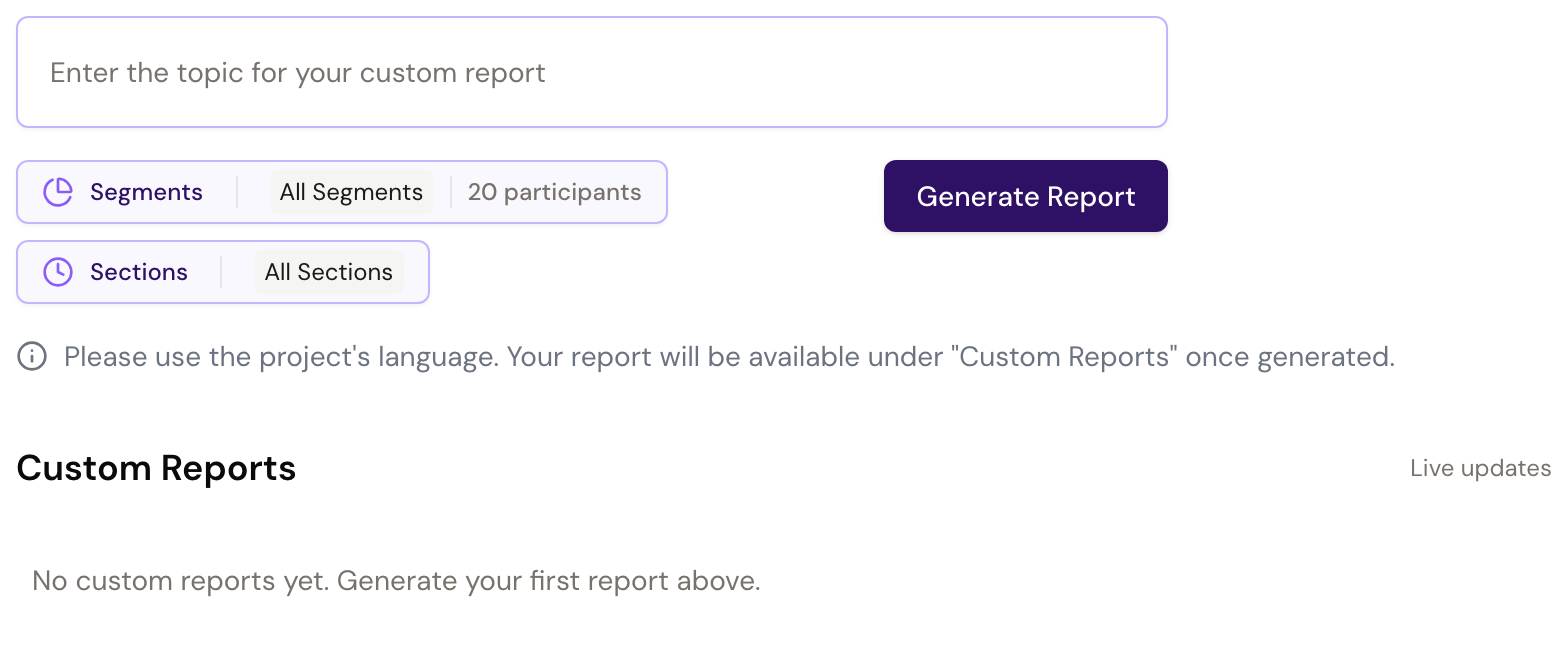
- Open Generate Custom Report.
- Enter the question or topic in the project language.
- Optionally select Segments and Sections before continuing.
- Select Generate Report. xelper turns the request into a report title and analysis focus and suggests suitable settings.
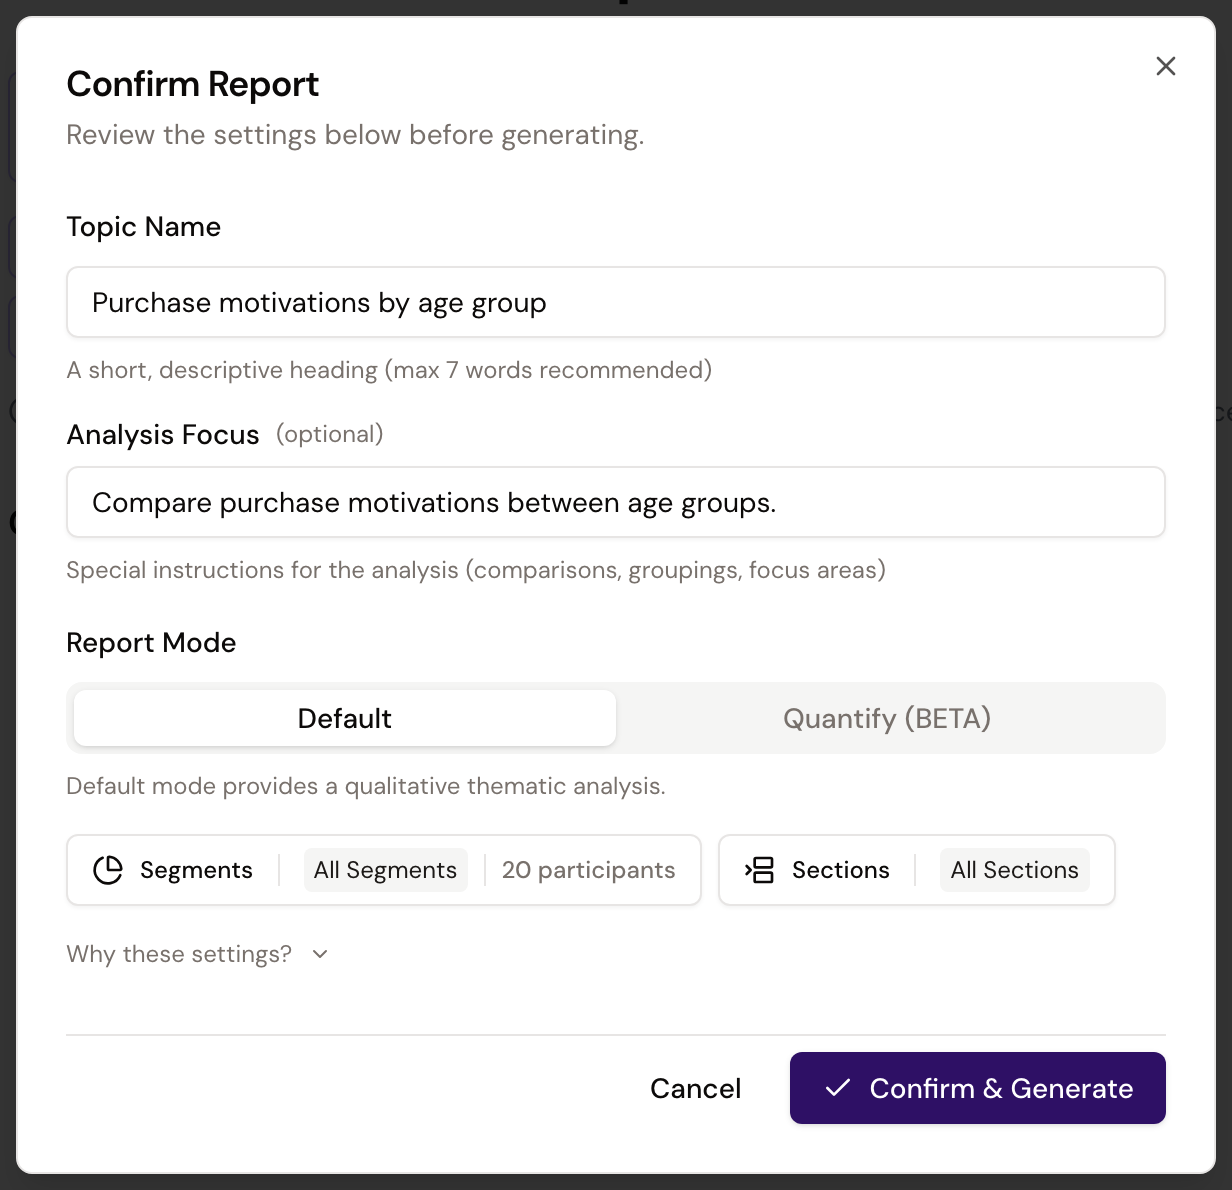
- In Confirm Report, adjust the title, analysis focus, report mode, and filters when needed.
- Select Generate Report to start the report.
The page shows generation progress. The report normally takes several minutes and appears under Custom Reports when ready.
Choose a report mode
The confirmation dialog offers two report modes:
- Default creates a qualitative thematic report with a summary, analytical headings, statements, participant counts, and links to the supporting notes.
- Quantify creates categories and counts the distinct participants assigned to each category.
For a Quantify report, you can add optional example categories. They guide the categorization but do not restrict xelper to those examples.
xelper may suggest a report mode or filters based on the question. Automatically suggested settings are marked AUTO and can be changed before generation.
Understand the resulting scope
The completed report displays the filters used during generation:
- Segment labels identify the participant groups included.
- Section labels identify the parts of the discussion guide included.
- The report heading and analysis focus describe the question and analytical framing.
These settings belong to that report version. Creating another filtered report adds a new version and leaves the existing one unchanged.
Who can create reports
Admin and Member can create Custom Reports and filtered reports. Client can also create them in IDI and focus-group projects when the project’s analysis tools are available.
Next step
Return to Topic reports to interpret the report structure, counts, and supporting evidence.