Data preparation
Manage participants
Use Participants to review speakers, decide whose statements count as participant responses, and add the information needed for filters and comparisons.
The following steps apply exclusively to IDIs & focus groups.
Review the table
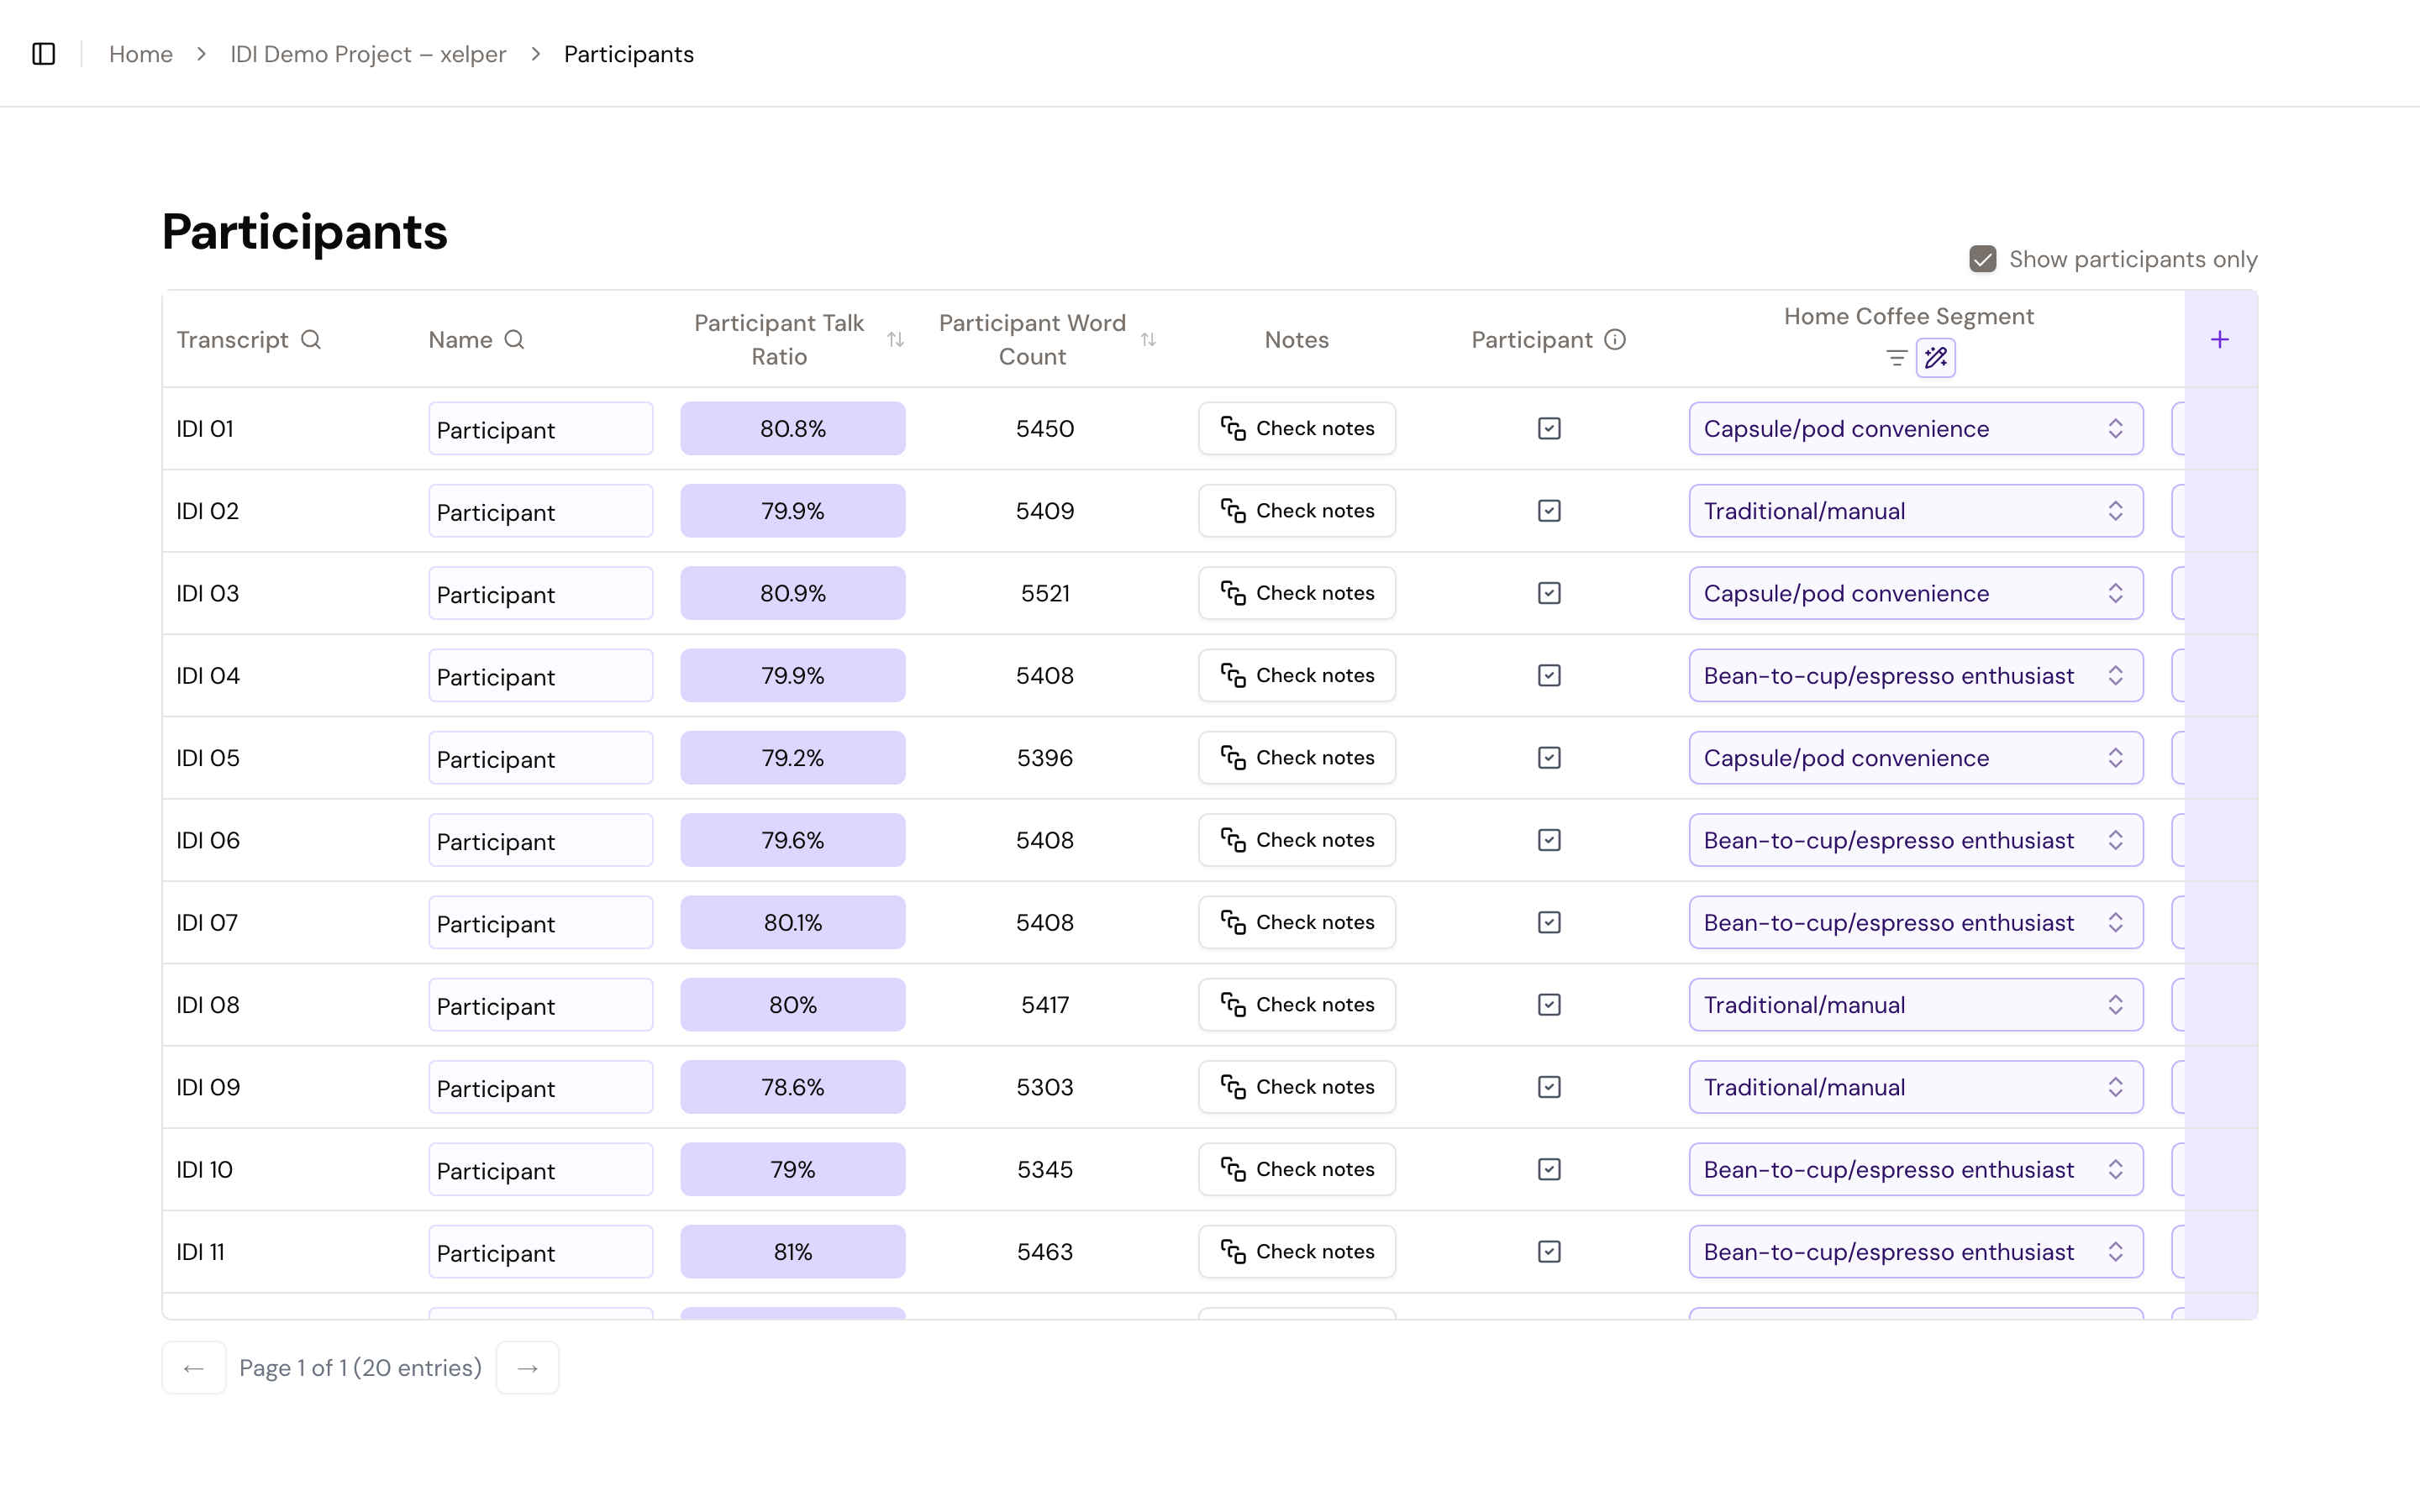
The table contains one row for each identified speaker and shows the name of the corresponding transcript.
Show participants only is selected by default. Clear it when you need to check speakers classified as interviewers or other non-participants. You can search or filter the table by participant name, transcript, segments, and other configured fields.
Select Check notes to review the notes assigned to one participant without leaving the table.
Rename a participant
Select the name in the Name column, enter the corrected name, and save it. The new name is used wherever that participant appears in the project.
Check the participant classification
The Participant column controls whose statements count as participant responses in the analysis. Interviewer questions and the surrounding conversation still provide context, but they do not count as participant responses.
Select the checkbox to mark a speaker as a participant. When you clear it, choose Interviewer or Other.
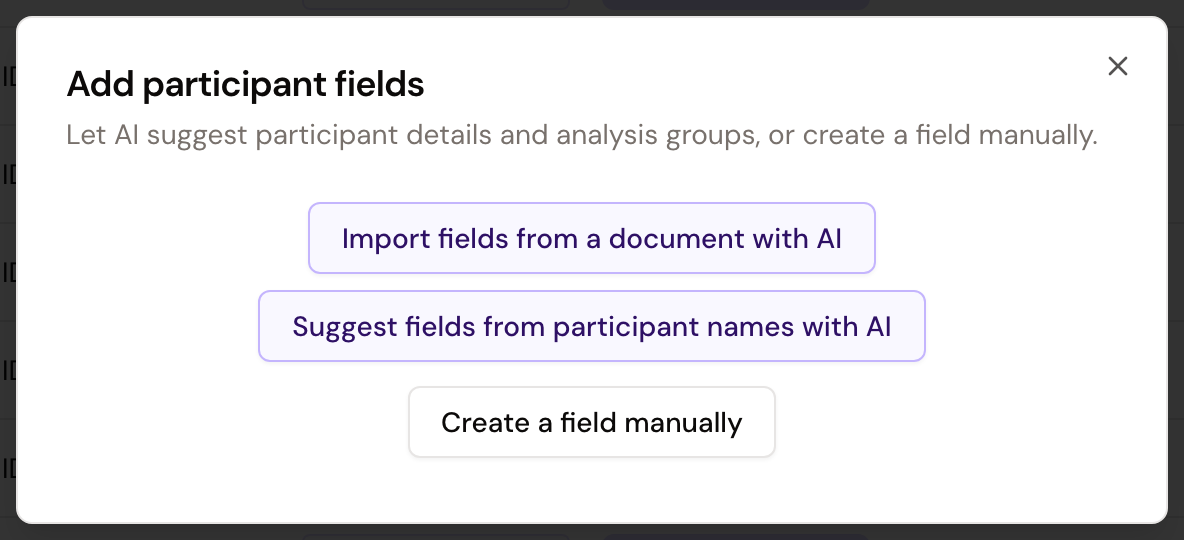
Add participant fields
Select Add participant field and choose the type of information you want to add:
- A Segment creates filterable groups for comparison and analysis, such as region or customer type.
- Metadata adds descriptive, searchable information that does not create an analysis segment, such as a reference number or job title.
Give the field a clear name. You can enter values directly or paste them from a spreadsheet.
Move the pointer over a participant field heading to show its four actions: search or filter the column, fill empty values with AI, switch the field between metadata and segment, or delete the field.
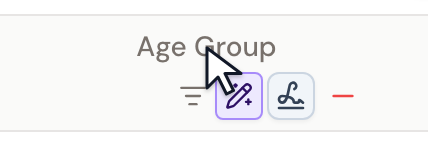
Deleting a participant field removes that field and all its values from every participant in the project. This cannot be undone.
Add metadata with AI
AI can propose fields and values from a document, derive them from participant and transcript names, or fill an existing field from the transcripts. Nothing is added until you review and apply the suggestions. Existing values are not replaced.
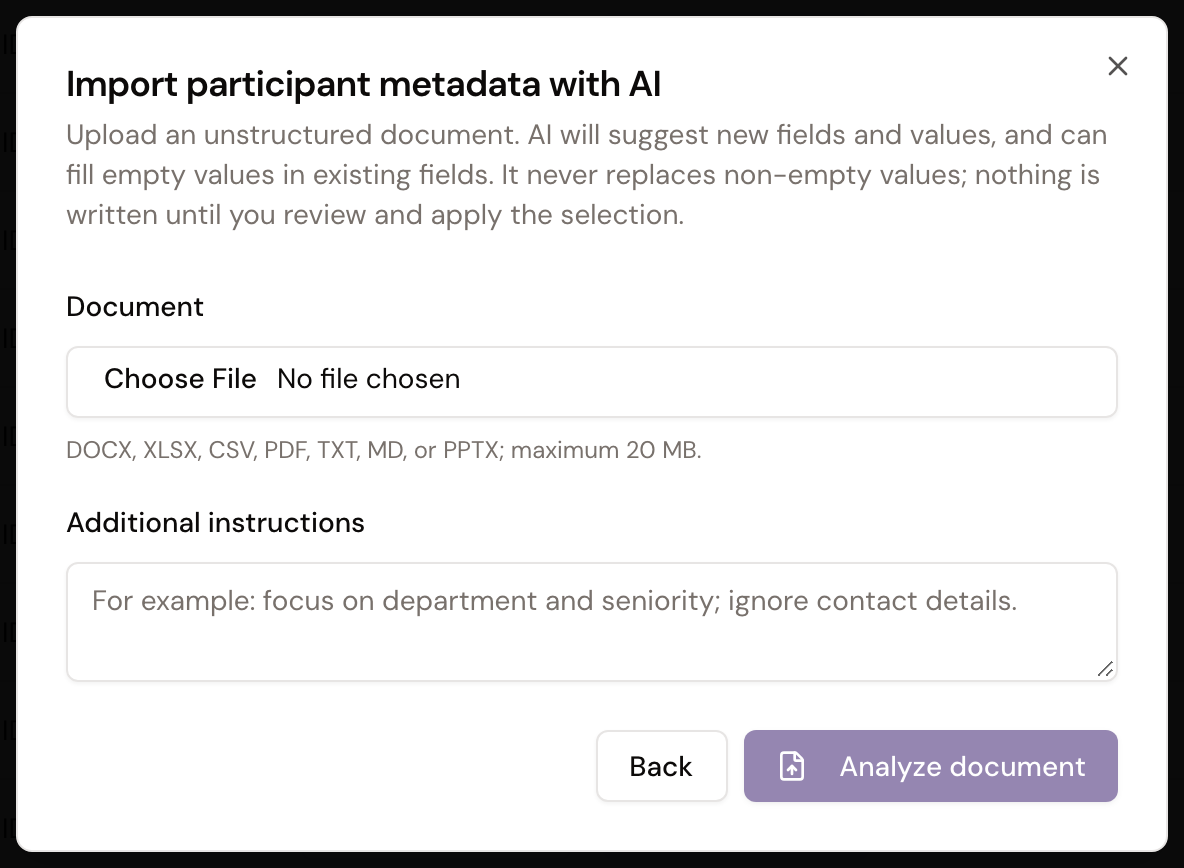
Import fields and values from a document
- Select Add participant field, then Import fields from a document with AI.
- Upload a DOCX, XLSX, CSV, PDF, TXT, Markdown, or PPTX file of up to 20 MB. If an Excel file contains several sheets, select the relevant sheet.
- Add optional instructions when the document needs interpretation, such as which information to use or ignore.
- Select Analyze document.
- Review the proposed fields and values. You can change field names, switch between Metadata and Segment, edit values, and deselect suggestions you do not want.
- Select Apply selected suggestions.
Suggest fields from participant names
Use this option when participant or transcript names contain a consistent structure, such as region or customer type.
- Select Add participant field, then Suggest fields from participant names with AI.
- Check the names shown for analysis and describe the naming pattern under Additional instructions when needed.
- Select Suggest fields.
- Review and edit the proposed fields and values, then select Apply selected suggestions.
Only the participant and transcript names shown in the dialog are used for these suggestions.
Fill an existing field
Select the AI icon for the field you want to fill, then choose one of two sources:
- Fill from transcripts with AI reviews the participant transcripts. Add optional instructions for the labels, language, or evidence the AI should use.
- Import values from a document with AI uses an uploaded document to propose values for the selected field.
Both options fill empty cells only. Review the proposed values, edit or deselect them as needed, and apply the selected suggestions.
Who can make changes
Admin, Member, and Client can review the participant information available to them.
Admin and Member can rename participants, change the participant classification, manage participant fields and values, and use the AI-assisted options. Client has read-only access.
The Participants page is read-only for Admin, Member, and Client. xelper maintains participant names, classifications, and fields as part of the managed workflow.
Next step
Once the participant information and segments are ready, continue by generating reports and the topline.